Roblox is one of the most popular video game communities online today. If you want to make money playing games, it’s probably worth learning how to use Roblox Studio. But what about making shirts? You could spend hours designing something in Adobe Illustrator or Photoshop, but there are easier ways to do it. In this guide, we’re going to show you how to make a shirt in Roblox Shirt Studio. We’ll walk you through the process step by step, including instructions for creating graphics in Gimp or Photoshop.
Step 1: Open Roblox Studio
Once you’ve downloaded the program, open it up and log into your account.
Step 2: Start a New Project
Once logged in, select “New Project.” From here, you’ll see a list of templates. Select the “Shirt” template.
Step 3: Add Text
Next, add some text to your project. To do this, simply double-click anywhere inside the canvas area. Then type away.
Things You Should Know
You can now make shirts for your avatars in Roblox. This feature allows you to customize your avatar with different colors, images, and even text. However, there are some things you should know about making a shirt before you start designing.
First off, you cannot use real money to buy Robux. Instead, you must earn Robux by playing games. To do this, you’ll need to open up Roblox Shirt Studio. From here, you can purchase Robux with PayPal, Amazon Payments, credit cards, debit cards, gift cards, and many others.
Next, you’ll want to choose a template. There are three templates included with the program: Basic Shirt, T-Shirt, and Hoodie. These templates come in black and white, and each one includes a front and back image.
After choosing a template, you’ll want to select a color scheme. Colors can vary depending on what you’re trying to accomplish. For example, if you’re looking to match your avatar’s skin tone, you might want to stick with a light gray or tan color scheme. On the other hand, if you’re trying to match your avatar’s clothing, you might want to pick a dark blue or purple.
Finally, you’ll want to add text to your design. Text can include anything from your name to a slogan to a quote. Just keep in mind that you won’t be able to change the font once you’ve uploaded your shirt.
Once you’ve finished adding text, you’ll want to preview your shirt. Here, you can see how your shirt looks on your avatar.
If everything goes well, you’ll be ready to publish your shirt. Click Publish, and you’ll be taken to the next step. Here, you’ll want to enter the URL where you’d like people to find your shirt. After entering the URL, you’ll be asked whether you want to allow anyone to view your shirt. By default, everyone can access your shirt. However, you can limit access by selecting specific groups.
Steps
Creating the Shirt
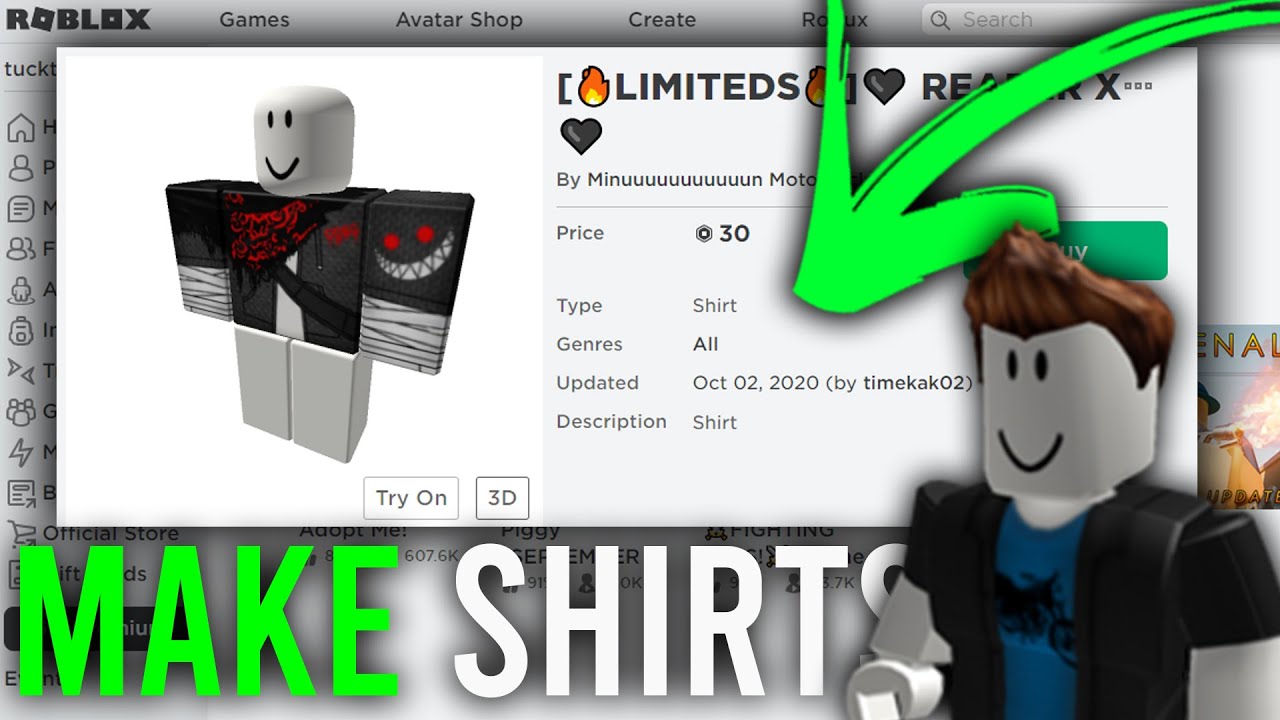
1.Go to If you are logged in, this should take you to your Home page.in your web browser www.roblox.comIf you are not logged in automatically, click Log In in the upper-right corner. Then enter the username and password associated with your Roblox Shirt account and click Log In. It costs 10 Rubux to make a shirt, so make sure youbuy some Robux before continuing. If you don’t want to purchase Robux, you can make a T-shirt for free. The difference between a shirt and a T-shirt is that a shirt wraps around the entire body of the avatar. A T-shirt is just a small graphic that goes on the front of the avatar’s chest.
2.Download the shirt template. You can download the shirt template from the Roblox Shirt website. Use the following steps to find and download it. Click the Create tab at the top of the page. Click the My Creations tab. Click Shirts in the menu to the left (not T-shirts.”)Click the link in the text that says “Did you use the template? If not, download it here.” at the top of the page. Advertisement
3.Save the shirt template onto your computer. To do so, right-click the template, then click Save image as…(or Save as…) in the resulting drop-down menu. Select a save location (e.g., your “Documents” or “Pictures” folder), and click Save. If you are using a Mac that doesn’t have the right mouse button, hold Control and click instead.
4.Open a photo editing program. You can use any photo-editing program. Once you have downloaded a photo editing program, click the icon in the Windows Start menu or Applications folder on Mac to open your photo editing program. If you have a subscription to Adobe Photoshop, you can use it to create your shirt. You can download Photoshop(and get a free trial) athttps://www.adobe.com/products/photoshop.htmlPhotoshop Elements is an inexpensive version of Photoshop that doesn’t have as many features as the full version. You can purchase and download it fromhttps://www.adobe.com/products/photoshop-elements/buy-elements.htmlAlternatively, you can use GIMP, which is a completely free alternative to Photoshop. You can download GIMP for free fromhttps://www.gimp.org/downloads.
5.Open the template in your photo editing program. Click and drag the template into your photo-editing program—or click File, and then click Open. Browse to where you saved the image template to and double-click it to open it.
6.Create a new layer. The Layers panel is usually in the lower-right corner. Click the icon that resembles a blank sheet of paper in Photoshop or the icon that resembles a folder with a plus sign in GIMP to create a new layer. Both are at the bottom of the Layers panel. If you don’t see the Layers panel in Photoshop, click Window in the menu bar at the top. Then click Layers.
7. Choose the new layer. Layers panel should show the newly created layer above the template layer. Selected layers can be selected by clicking them. When creating your art for the shirt, this will prevent you from modifying the template. Click and drag the new layer to the top of the Layers panel if it is not above the layer with the template.
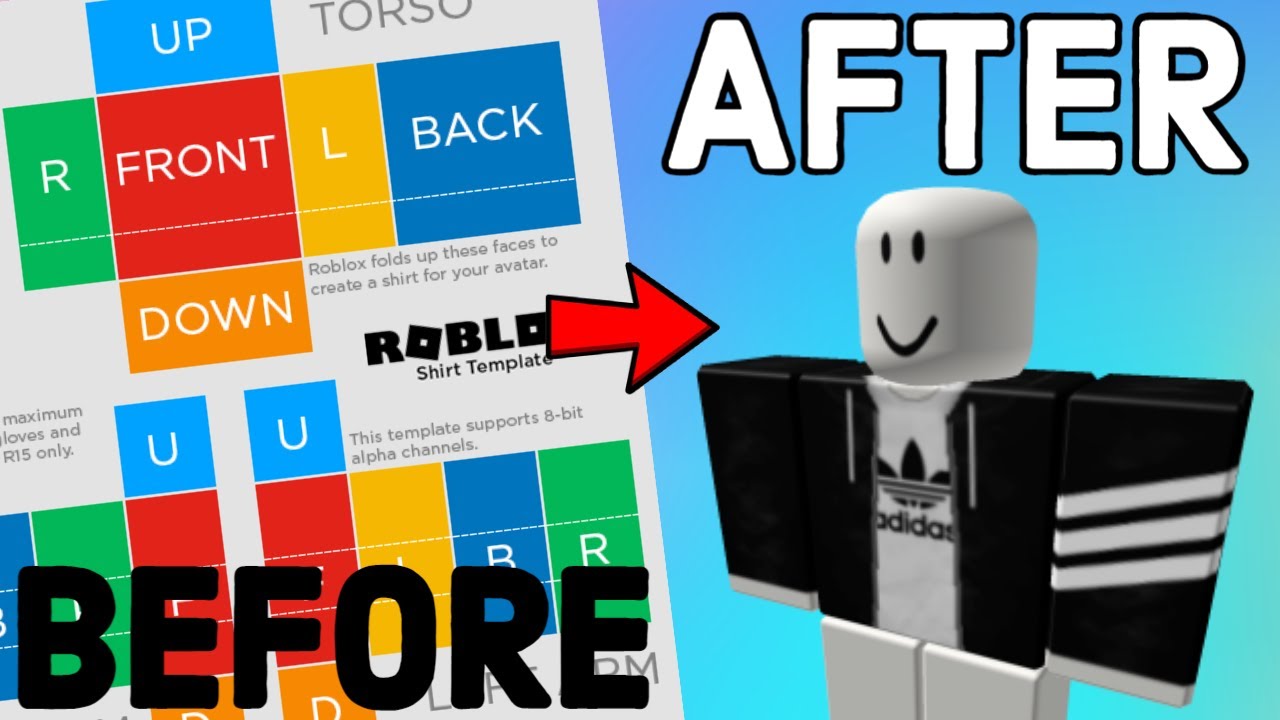
8. Templates can be edited. Unwrapped shirts and sleeves are shown on a flat surface in the template. As you can see from the color boxes, the fronts, backs, sides, tops, and bottoms go in different directions. Upper-right corner shows the torso. On the template, the left and right sleeves are located at the bottom. In the upper-left corner, you can see the images of the avatar showing where each colored box is located. Here is a guide that you can use. Shirt colors can be changed by coloring over the boxes, and images can be placed on the front or back. On the front, the back, or the sleeves, you can also add text. Imagination is key! On the sleeves, there are dotted lines that indicate where the sleeves should end. Short sleeves can be created by leaving the area below the top dotted line blank. Long sleeves can be created by leaving the area below the bottom dotted line blank. If you do not want clothing to cover any areas, leave them blank.
9. The template layer should be turned off. You can do this by clicking on the eyeball icon next to the template layer in the Layers panel. The template layer will be hidden as a result. There should be a transparent background behind the art for your shirt. In most cases, transparency is indicated by a checkerboard pattern in white and gray.
10. Make a PNG image of your shirt. Transparent backgrounds are preserved in PNG images. Avatar’s arms and hands will be protected from discoloration by the template colors. The image can be saved as a PNG using the following steps: Photoshop – Click File – Save a copy. Then enter a name for your shirt next to “File name.” Use the drop-down menu next to “Format” to select “PNG (*.png).” Then click Save in the lower-right corner. Select Export from the File menu in GIMP. The top of the dialog box asks you to name your shirt. A menu will appear when you click Select File Type (By Extension) at the bottom. In the menu, choose “PNG Image.”. On the lower-right, click Export.
Testing the Shirt
1. Make sure your shirt looks good before you spend 10 Robux uploading it in Roblox Studio. It’s free, but you’ll have to upload the shirt image as a decal in your browser. Visit www.roblox.com and click Log In if you’re not already logged in. Click Log In after entering your Roblox username and password.
2. You can find it at the top of the website under the third tab. Add a tab.
3. On the Create page, click It’s the first tab. This page will open automatically when you click on it. The list of your creations can be viewed by clicking this tab if you have not already done so. The creations I have made.
4. From the menu to the left, click It’s. Uploading a decal does not cost anything. There is no limit to how many Decals you can upload.
5. As a decal, upload the image of your shirt. Click Upload file at the top of the screen to do so. You can open your shirt image file by selecting it and clicking Open. The file name needs to be entered next to “Decal name.” Click Upload.
6. Click your image file. All your decals should be listed below the section at the top where you upload an image. Locate the decal you just uploaded in the list and click it.
7. Copy the file code. The file code is in the numeric section in the URL in the address bar of your web browser. It is the number section immediately after “www.roblox.com/library/” in the URL. You do not need to copy the entire URL. Just highlight and copy the numeric portion of the URL.
8. Open Roblox Studio. Roblox Studio has an icon that resembles a blue tilted square. You can use Roblox Studio to make games and assets for games. You can also use it to test your shirt before uploading it. If you haven’t already downloaded Roblox Studio, go ahead and use the following steps to download and install Roblox Studio for free: Go to www.roblox.com/createin your web browser. Click Start Creating to download the installation file. Double-click the installation file in your Downloads file to open it. Follow the instructions to finish installing Roblox Studio.
9. Open a game. You can open any game in Roblox Studio. It doesn’t need to be a completed game. In fact, you can just open one of the game templates. Use the following steps to do so: Click New in the menu to the left. Click the All Templates tab at the top. Click any one of the templates to open it.
10. Test play your game. Doing so will place your avatar in the game. Use the following steps to test play your game: Click the Home tab at the top. Click Playin the menu panel at the top.
11. In the Explorer window, locate your username. Explorer is normally displayed on the right side of the play screen. On the top menu panel, click Explore if the Explorer window doesn’t appear. When the Workspace assets are expanded, you can find your user name by clicking Work space at the top of the Explorer window. Select your username from the list below “Workspace” and click on it to expand it.
12. The Properties window will display the shirt’s properties when you click This. In the Explorer window, the Properties window is displayed by default. Under your username, you’ll find your shirt. Click the View tab at the top if the Properties window does not appear. In the panel at the top, click Properties.
13. The “Shirt Template” should appear below the “Appearance” header after you paste the file code next to “Shirt Template”. Replace the default URL with the image file code you copied from Roblox next to “Shirt Template”. You can then add attributes by clicking Add Attribute. In the Properties window, click Add Attribute. You can then view what the shirt looks like before uploading it by applying the decal as a shirt. Observe the shirt from different angles by walking in different directions.
14. Files with shirt images should be archived. You will only be able to access the shirt image file if you archive the file. Your shirt graphics will not be stolen by other users. Archive the image file by following these steps:[2]X Research source Log into https://www.roblox.com/Click the Create tab. To access My Creations, click the button. On the Decals tab, click. You can access your shirt image file by clicking the gear icon. Select Configure. At the bottom of the page, click Archive. Save your changes.
Uploading the Shirt
1. Open the Roblox main page.
2. If you are already logged in,this should take you to the home page. If you are not logged in automatically, click Log-In in the upper-right corner. Then enter the username and password associated with your Roblox account and click Log In.
3. Click the Create tab at the top of the website.
4. Normally, you will open to this page automatically.
5. Click Upload the shirt.
6Select the image you want to use and click Open.
7Click Save.