When it comes to painting, black is one of the most powerful and timeless shades to use. From Renaissance masterpieces to modern abstract art, black paint is a staple in the art world. Whether you are an artist or a DIY enthusiast, knowing how to make black paint is a valuable skill. Crafting your own black paint is a great way to save money and create unique color combinations. In this blog post, we will be discussing the process of making your own black paint from scratch. We will take you through the necessary materials and steps to create your own custom blend of black paint. By the end of this post, you will have the knowledge and confidence to craft your own black paint.
1. Gather black pigment and a binder
To make black paint, you’ll need to gather a black pigment and a binder. The black pigment can be a natural material like charcoal or graphite, or a manufactured material like carbon black. The binder will hold the pigment together and help it adhere to the surface. Common binders include acrylic, oil, and water. For an oil-based paint, you’ll need an oil-based binder, like linseed oil or walnut oil. For an acrylic paint, you’ll need an acrylic binder, like acrylic medium or an acrylic polymer. The binder should be a few parts to one part pigment.
2. Mix the pigment and binder together
Once you have gathered all of your supplies, the next step in making black paint is to mix the pigment and binder together. Mix the pigment and binder in a ratio of 1 part pigment to 4 parts binder. This will ensure that the pigment is evenly distributed throughout the mixture. Use a spoon to mix the pigment and binder together until you have created a thick and even paste. Be sure to mix for a few minutes to ensure an even consistency. If the paint is too thick, you can add more binder and mix until you have reached the desired consistency.
3. Adjust the consistency of the paint
After you have created your own black paint, you will need to adjust the consistency. The consistency of the paint will depend on your painting project. If you are painting a wall, you will need a thicker consistency than if you are painting a smaller object. To adjust the consistency, you can add more paint thinner or more paint medium. If you want to add more paint thinner, add a few drops at a time until you reach the desired consistency. If you want to add more paint medium, mix in a medium such as linseed oil. Make sure to mix your paint thoroughly after each addition until you reach the desired consistency.
4. Add a medium to make the paint more workable
The fourth step in making black paint is to add a medium to make the paint more workable. A medium is any material that helps to either thin or thicken paints. These can include oil, water, or a combination of both. Thinning the paint with a medium helps to preserve the original pigments and hues of the paint while increasing the workability. Adding a medium also helps to make the paint more evenly spreadable, allowing the paint to go further and be more cost-effective.
5. Store the paint in an airtight container
Now that you have your black paint, it’s important to store it correctly. This is especially true if you plan to make more batches of black paint in the future. The best way to store your paint is to pour it into an airtight container. This will protect it from any potential damage caused by outside influences, such as moisture in the air or light. Make sure to tightly close the lid of the container to ensure a good seal.
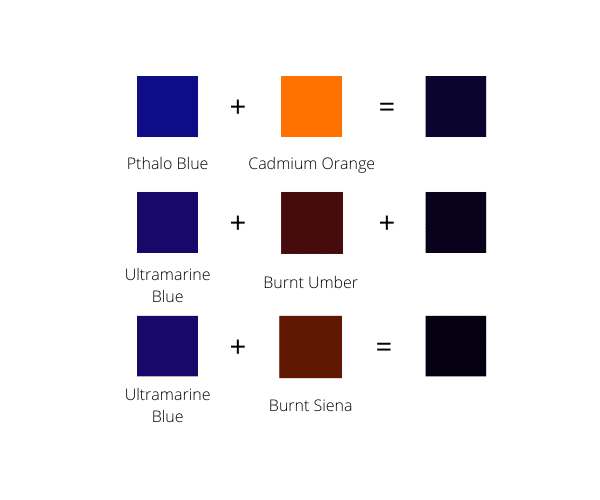
In conclusion, making black paint from scratch is not as difficult as it may seem. By using a variety of colors, such as red, blue, yellow and white, you can mix them together to create a rich black tone. With a few simple supplies, patience, and practice, you can make a range of black paints that can be used in a variety of artistic projects.