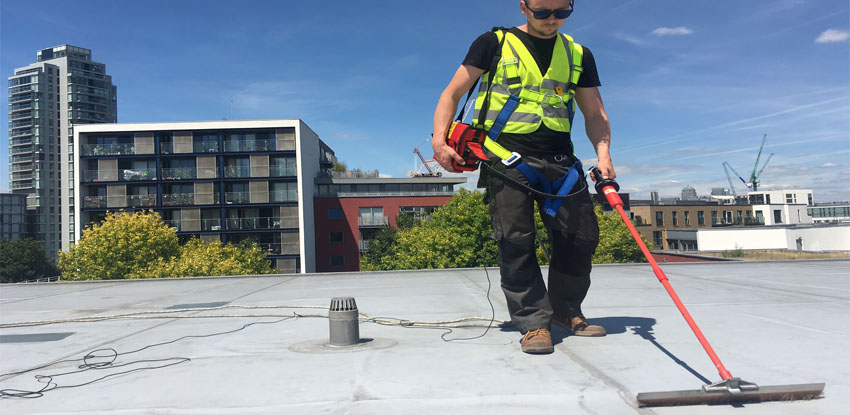
Roof leaks can be detected through several methods, each involving careful inspection and analysis of the roof’s condition:
Visual Inspection:
Visual inspection is a fundamental method used to detect roof leaks by visually examining the exterior and interior areas of a property for visible signs of water intrusion or damage. Here’s how visual inspection aids in detecting roof leaks:
Exterior Examination:
- Shingle Inspection: Check for missing, damaged, or curled shingles that could allow water penetration into the roof structure.
- Flashing Assessment: Inspect flashing around chimneys, vents, or skylights for signs of corrosion, gaps, or loose sections that might cause leaks.
Roof Structure Evaluation:
- Gutter Inspection: Examine gutters and downspouts for clogs or debris that could obstruct proper water drainage, leading to potential leaks.
- Valley Inspection: Assess roof valleys, where two slopes meet, for signs of wear or debris accumulation that might impede water flow.
Interior Observation:
- Ceiling and Wall Examination: Look for water stains, discoloration, or sagging areas on ceilings and walls that indicate potential water leaks.
- Attic Assessment: Check the attic for signs of water intrusion, such as damp insulation, mold growth, or visible drips from the roof structure.
Common Signs:
- Mold or Mildew: Presence of mold or mildew growth on ceilings, walls, or in the attic suggests moisture infiltration.
- Dampness: Feel for damp or soft areas on walls or ceilings, indicating potential water saturation due to leaks.
Identification of Entry Points:
- Localized Damage: Notice areas where the roof appears compromised, such as cracked or damaged sections.
- Chimney and Vent Issues: Pay attention to potential gaps or loose seals around chimneys, vents, or other roof penetrations.
Water Testing:
Water testing is a method used to detect roof leaks by simulating rainfall or water flow onto specific areas of the roof to identify potential leak sources. Here’s how water testing aids in detecting roof leaks:
Methodology:
- Hose Test: Simulate rainfall by directing water from a hose onto suspected leak areas or potential entry points on the roof.
- Systematic Approach: Apply water methodically, starting from the lowest parts of the roof and progressing upwards to pinpoint leak sources.
Inspection Process:
- Interior Observation: While water is applied externally, individuals monitor the interior for signs of water intrusion, such as visible drips or moisture.
- Ceiling and Wall Examination: Check ceilings, walls, and attic spaces for water stains, discoloration, or dampness caused by potential leaks.
Controlled Water Flow:
- Focused Application: Direct water onto specific areas suspected of leaks, including around chimneys, vents, valleys, or damaged sections.
- Observation Period: Allow sufficient time for water to penetrate and potential leaks to manifest in the interior spaces.
Collaborative Approach:
- Team Effort: Collaborate with a partner inside the property while conducting the water test to promptly identify any signs of water entry.
- Systematic Monitoring: Carefully observe and document any visible signs of water intrusion during and after the testing process.
Limitations:
- Inaccuracies: External factors like wind direction or pressure might affect water flow, causing inaccuracies in identifying the actual leak source.
- Surface Absorption: Porous roof materials or surface absorption might delay visible signs of leaks indoors, requiring extended observation.
Thermal Imaging:
Thermal imaging is a method used to detect roof leaks by identifying temperature variations that can indicate moisture intrusion or hidden leaks within the roof structure. Here’s how thermal imaging aids in detecting roof leaks:
Working Principle:
- Temperature Variation: Thermal imaging cameras detect temperature differences, showing areas of heat or coolness that might signify moisture presence.
- Moisture Detection: Moisture, often resulting from roof leaks, retains different thermal properties, causing temperature variations detectable by the camera.
Inspection Process:
- Roof Surface Scan: Thermal imaging cameras scan the roof surface, capturing infrared images that display temperature differentials.
- Identification of Anomalies: Areas with unexpected temperature variations are highlighted on the thermal images, indicating potential moisture or leak locations.
Leak Source Identification:
- Hidden Leaks: Thermal imaging helps locate hidden leaks or moisture infiltration not visible to the naked eye.
- Affected Areas: It identifies affected sections of the roof structure, such as wet insulation or water trapped within the roof layers.
Benefits of Thermal Imaging:
- Non-Destructive: It’s a non-invasive method, allowing detection without causing damage to the roof or requiring physical access to the leak point.
- Efficiency: Thermal imaging efficiently covers large roof areas, providing a quick overview of potential leak sources.
Limitations:
- Surface Temperature: Extreme external temperatures can affect accuracy, potentially masking small leaks.
- Insulation Influence: Highly insulated areas might limit heat transfer, affecting the camera’s ability to detect temperature differences.
Professional Assessment:
- Expert Analysis: Trained professionals interpret thermal images to identify anomalies and assess potential leak sources.
- Reporting: Professionals generate reports outlining identified areas of concern and recommend further investigations or repairs.
Professional Inspection:
A professional inspection is a crucial step in detecting roof leaks as it involves the expertise of trained professionals who employ specialized tools and techniques. Here’s how a professional inspection aids in detecting roof leaks:
Roofing Contractor Assessment:
- Visual Examination: Trained roofers conduct a detailed visual inspection of the roof’s exterior, looking for damaged or missing shingles, deteriorated flashing, or compromised roof components.
- Roof Structure Evaluation: They assess the overall integrity of the roof structure, including valleys, ridges, eaves, and any potential weak points susceptible to leaks.
Specialized Tools:
- Moisture Meters: Roofers use moisture detection devices to identify areas where moisture levels are higher than normal, indicating potential leak sources.
- Thermal Imaging: Infrared cameras help identify temperature differences that might signify moisture infiltration or hidden leaks within the roof structure.
Attic Inspection:
- Interior Examination: Roofing professionals inspect the attic space for signs of water intrusion, such as damp insulation, water stains, or mold growth.
- Ventilation and Insulation Check: They assess ventilation systems and insulation, as poor ventilation can lead to moisture buildup contributing to leaks.
Drone Inspection:
- Aerial Assessment: Drones equipped with high-resolution cameras are used to survey large or difficult-to-access roof areas, providing detailed images for inspection.
- Detailed Imagery: Drone footage helps spot damage, cracks, or deterioration that might not be visible from ground-level inspections.
Report and Recommendations:
-
- Detailed Reports: Professionals provide comprehensive reports outlining identified issues, locations of leaks, and recommended repair strategies.
- Repair Plan: Based on their assessment, they suggest repair solutions to address identified leak sources and prevent future issues.
Interior Investigation:
When detecting roof leaks, interior investigations play a crucial role in identifying potential sources of water intrusion. Here’s how interior investigations aid in detecting roof leaks:
Attic Inspection:
- Signs of Moisture: Check for damp insulation, water stains on wood or rafters, or any signs of mold or mildew growth, especially along the roofline.
- Daylight Penetration: Look for spots where daylight penetrates through gaps or cracks in the roof structure, indicating potential entry points for water.
Ceiling and Wall Assessment:
- Water Stains: Examine ceilings and walls for water stains, discoloration, or sagging areas, which are visible signs of water leaks.
- Peeling Paint or Wallpaper: Notice any peeling or bubbling of paint or wallpaper, often caused by moisture seeping through from the roof.
Inspecting Fixtures:
- Chimneys or Vents: Inspect areas around chimneys, vents, or skylights for signs of deterioration or gaps that might allow water entry.
- Plumbing Penetrations: Check areas where plumbing pipes or electrical conduits penetrate through the roof for potential leak points.
Condensation or Humidity:
- Moisture Levels: Assess indoor humidity levels, as excessive moisture indoors can sometimes result from roof leaks.
- Condensation: Look for condensation buildup in attic spaces, as it might indicate poor ventilation or a leak source.
Locating Drips or Water Trails:
-
- Tracing Water Trails: Follow visible drips or water trails to their origin on ceilings or walls to pinpoint the entry point.
- Periodic Checks: Regularly monitor areas previously affected by leaks to identify recurring issues or new signs of water intrusion.
Interior investigations for roof leaks involve examining attic spaces, ceilings, walls, fixtures, and monitoring moisture levels to identify signs of water intrusion. This meticulous inspection aids in tracing leaks to their source, facilitating effective repair solutions to prevent further damage.
Conclusion:
Detecting roof leaks involves a systematic approach that includes visual inspections, water testing, thermal imaging, professional assessments, and interior examinations. Combining these methods helps identify leak sources and allows for effective repairs to prevent further damage.